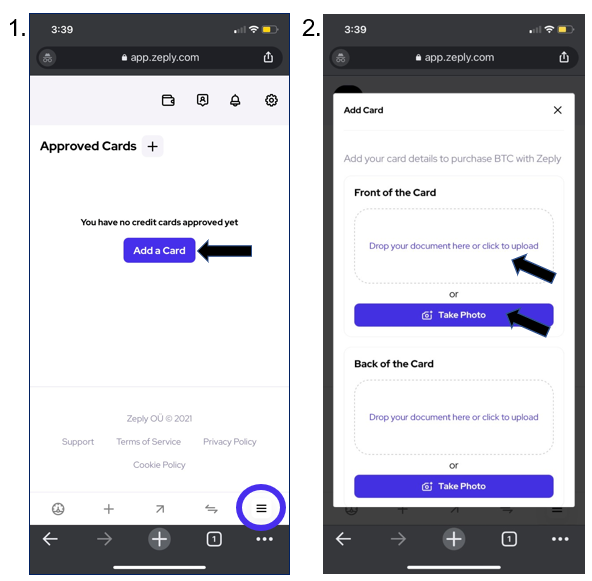
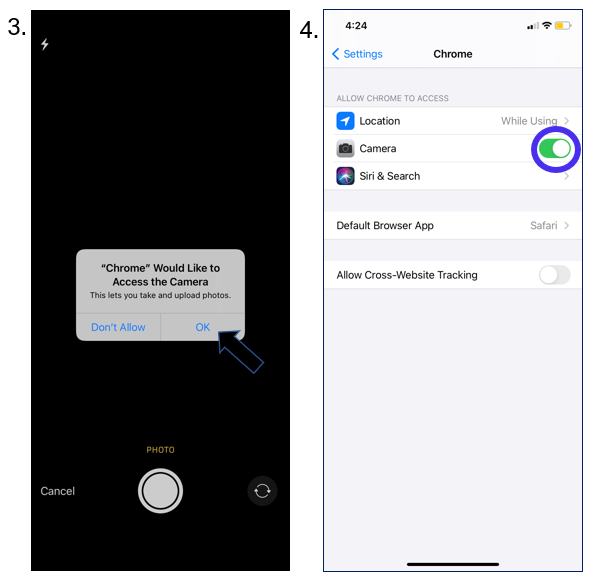
Start off by heading over to the “Cards” tab which can be found from the selection menu at the bottom of your account. Click on the “Plus” icon.
You will need to upload images of the front and backside of your card. You may either upload an existing image or take a live photo.

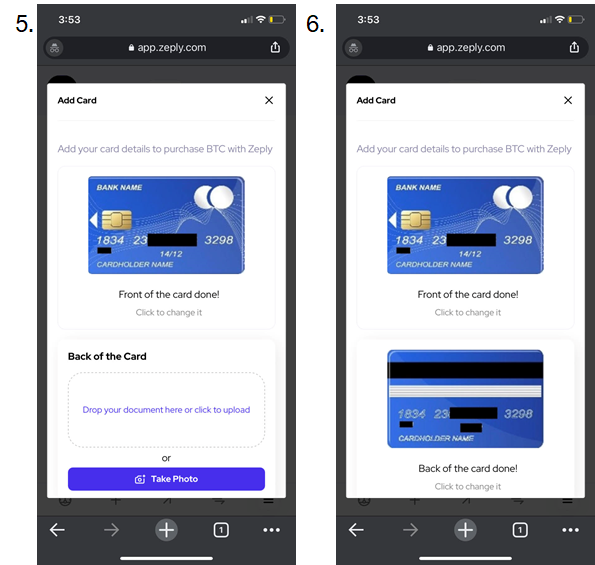
If you would like to take a live photo, you will be prompted to allow access to your camera. Click on “OK“.
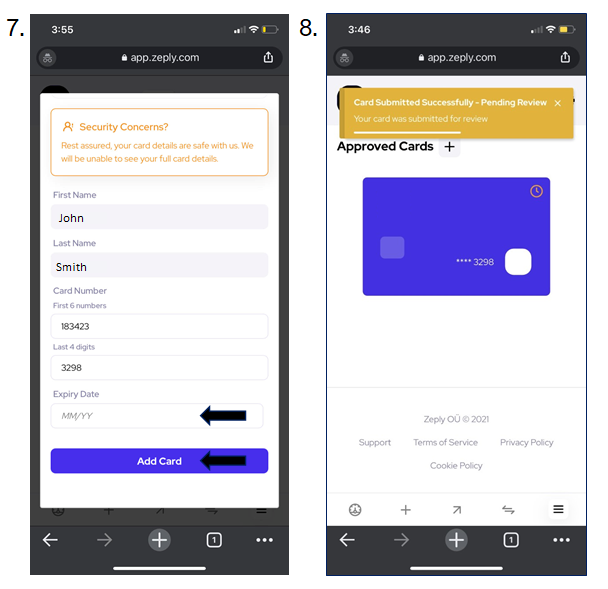
If you did not receive the pop-up to allow access to your camera, please ensure that it is enabled on the Settings section of your device.

Security is very important for us here at Zeply. Therefore, your card will be automatically truncated, leaving the first 6 and last 4 digits of your card visible.
When the front side has been added, you can move on to uploading the back side.

We will need you to add the card’s expiry date in the required field. Your card number details have been added for you. When complete, click on “Add Card“.
Your card will now be saved securely for future purchases. You will receive an email notification as soon as your card is approved to be used on our Platform! This will only take a few minutes.

Note: You can remove the card at a later stage if no transactions have been completed using that card.